This tutorial will give an example of how to create a print-ready business card using Inkscape, a popular open source vector art application. The term “print-ready” is relative here, as Inkscape does not natively support CMYK using color profiles. According to Inkscape’s wiki page, you can import a file into Scribus, a page layout program, or open the file in Acrobat Distiller on Windows systems for CMYK compatibility. Still, if a 100% match between screen color and final printed product is not necessary, Inkscape is more than adequate. “Print ready” here refers to proper size specifications for print. This tutorial is geared towards designers creating their first business card for either themselves or perhaps a small business.
Preparing our Work Environment
- First, we open Inkscape and save a new document. We can name this “buscard-example.svg”
-
Next, we must make the document boundaries the same size as a typical business card. The dimensions of a business card are 3 1/2 by 2 inches.
This is a good time to introduce the term bleed. “What is a bleed?”, you may ask. A bleed is 1/8 inches of space around all four sides of the business card so that any color or images that extend beyond the dimensions of the card don’t have a white border around them. A bleed may not be necessary for a card with an all white background, but it is a good idea to include this extra space anyway
-
3 1/2 + 1/4 (1/8 inches on two sides) and 2 + 1/4 translates decimal wise into 3.75 by 2.25 inches. Thus, we must set our document to this size.
Go to File > Document Properties (or Shift+Ctrl+D on a PC Shift+Cmd+D on the Mac). Make sure the units are inches and under Width enter 3.75; under Height enter 2.25
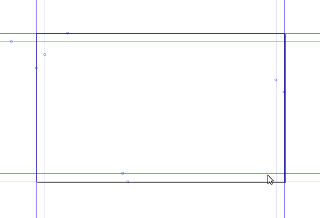
- Next, we must add guides for the actual card area. First, we must display the ruler units as inches. For this, we go back to Document Properties and under the Page tab (the first one that comes up), change the default units to in. From here, zoom in once and drag a guide 1/8 inches in from each side as shown in the screenshot below. In addition, you may place guides at the outermost edges of the bleed
The Design Part
- The previous section represents pretty much the basics of preparing the business card’s dimensions for print. If you wanted to complete the design using only Inkscape and the business card’s information, you could probably stop reading the tutorial here. However, I’m creating a business card with a textured background in order to show the proper pixels-per-inch for print
- Using Gimp 2.6, I created the simple textured blue background to go behind the business card’s copy. The important point is that I used the Scale Image feature to scale the image to the size of the business card + bleed (3.75 by 2.25 inches). Photoshop users can use the Image Size dialog. Also, I set the X and Y resolution to 300 pixels-per-inch, a general rule for decent print quality
- Next, we can Save a Copy (File > Save a Copy) of this as a tagged image file–pretty standard for print work
-
The next step is to place this .tif file as a background within our Inkscape .svg file. This can be done via Inkscape’s Import feature (File > Import). When importing, you are given the choice to Embed or Link the image, choosing Embed will create a larger file size, but the image will be part of the .svg file.
Optionally, you can choose Link, which will make the Inkscape file size smaller, but the file that is linked must be saved with the .svg file relative to it. For instance, if your tif file is in a folder labeled images on your computer, it must be in the same location on your distribution media. For the purpose of ease, we will choose Embed
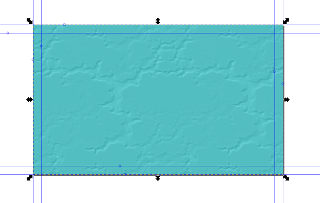
- As you can see in the screenshot below, the image is too large for our card’s drawing area, so we must shrink it to the size of the bleed’s bounding rectangle. The best way to do this is to turn on snapping (View > Snap) and snap the outer edges of the tif image to the bleed’s bounds. You will see a message that says “Corner to guide intersection” before it snaps to each corner
- The screenshot below shows the scaled background image. So now, we can fill in fictional information about the client (a plumbing company) and supporting graphics
- A few notes about text within your card’s bounds–after Googling for proper business card dimensions with bleed, the first website in the search was Printing for Less‘s Business Card Size Specifications page (http://www.printingforless.com/Business-Card-Specifications.html). On this page, they recommend a safe zone within the 3 1/2 by 2 inch space so that text will not possibly be clipped. Thus, we will add guides at 1/8 of an inch in from each side of the the business card’s area as well. Keeping these guidelines in mind, we can place our copy text on the page
-
The final step is to save the the file in a format suitable for print. Adobe’s PDF format, which Inkscape supports, is now widely accepted at many online and brick-and-mortar print services.
We will Save as (File > Save As) a pdf file. In the dialog box that pops up and next to Resolution for rasterization (dpi), type in 300. That’s it! Your business card (the .pdf file) is now properly prepared to be sent to a printing service. If you are taking the file to a brick-and-mortar print service, copy it to removeable media. Below is a screenshot of the finished design in the pdf format
If anyone is interested in the font I used it is called Top Secret and can be found at Font Squirrel (http://www.fontsquirrel.com/fonts/Top-Secret). Also, I left a link to download the tif background and Inkscape .svg files if needed.
Link to download the .tif file.
Link to the .svg file– for the svg file, right click and Save As.


